Creating and Deploying a Cloudflare worker with Nodejs (Typescript)

Ishwar Datt Mishra
4 min readOct 20, 2023

--

This article attempts to break down the development and deployment of a Cloudflare worker with Wrangler cli into simple and easily followable steps.

  1. Log in to the Cloudflare dashboard and navigate to Worker and Pages
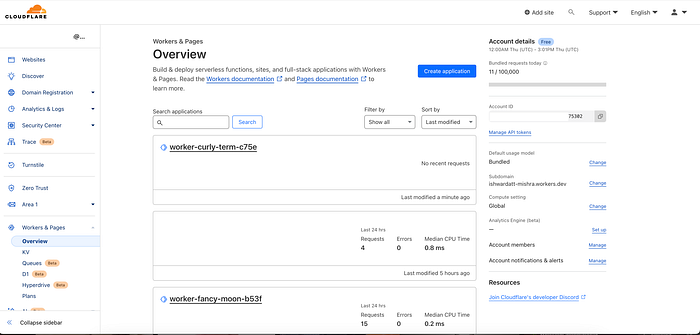
2. In Worker and Pages (refer to image above ) go to Create application and on the next page give any name to the worker, here we are providing the name learn-worker. And hit Deploy.
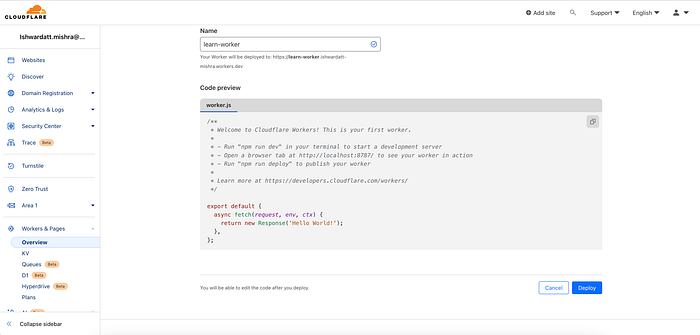
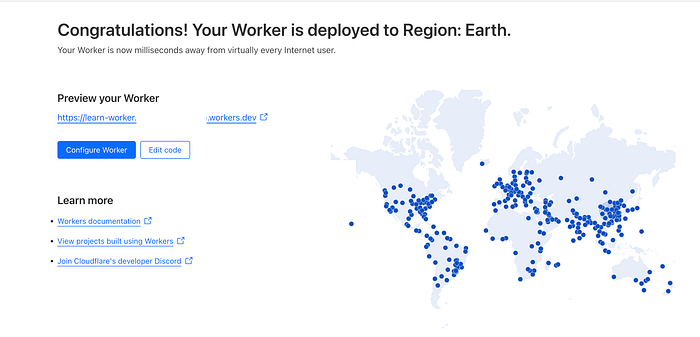
3. Now you can see a link under the Preview Worker header if you click it you can see a web page which says “Hello World!”. Congratulations!! your worker has been deployed.

4. Now hit the edit code button and go to the Develop with Wragler CLI section.

5. In the section you will find some steps displayed, we’ll follow them one by one.

  • Install Wrangler: npm install -g wrangler
  • Login to Cloudflare using Wrangler: This step will take you to the browser and you’ll be asked to allow Wrangler to access: wrangler login
  • Initialize the project: wrangler init — from-dash <worker name you chose> after this you’ll be asked some questions in cli, and answer them as per your requirements.
  • Publish code via Wrangler: wrangler publish
#Step 1 Install Wrangler
npm install -g wrangler
#Step 2 Cloudflare Login With wrangler
wrangler login #one you do this you will be taken to browser to complete auth
#Step 3 Instiallize the project
wrangler init --from-dash <worker name you chose>
#Step 4
wrangler publish #this will publish your project this can be skipped for now.

6. After initialising the project you’ll get the following folder structure:

7. Now let’s write a small program using a node module present on NPM. Make a file called index.ts and copy the below code in it.

import { uniqueNamesGenerator, Config, adjectives, colors, animals } from 'unique-names-generator';

export default {
async fetch(request, env, ctx) {
const customConfig: Config = {
dictionaries: [adjectives, colors],
separator: '-',
length: 2,
};

const randomName: string = uniqueNamesGenerator({
dictionaries: [adjectives, colors, animals],
});

const shortName: string = uniqueNamesGenerator(customConfig);
return new Response('Unique name is ' + shortName);
},
};

8. Run npm i unique-names-generator to download the npm package.

9. Run npm start this will start the wrangler dev server on your local machine. You will get out with some IP (your local machine IP with some port) in the terminal just open the IP in the browser and you should see output like Unique name is <some unique name>.

10. Now we can see that our code is working locally and it’s time to publish it to our Cloudflare worker. Let’s publish this code using Wrangler publish, once the code is published use the URL you got in Step 3 to check your worker in action.

Note: Node.js APIs are available under the node: prefix, and this prefix must be used when importing modules, both in your code and the npm packages you depend on. Refer to the link here: https://developers.cloudflare.com/workers/runtime-apis/nodejs/

In this way, we can develop, test locally and deploy a worker using the Wrangler cli tool.

--

--

Ishwar Datt Mishra
Ishwar Datt Mishra

Written by Ishwar Datt Mishra

Software enthusiast with 6+ year experience. In Software Development and Cloud Technologies.